
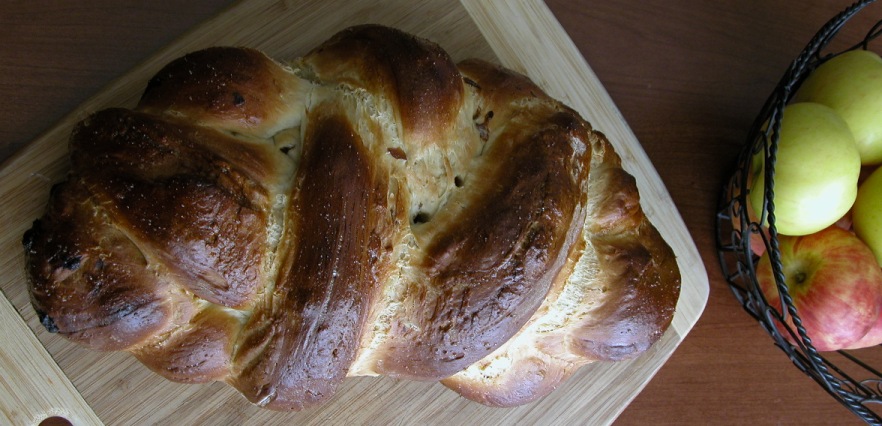
Yom Kippur September 28th, 2009 Braided Levain Challah
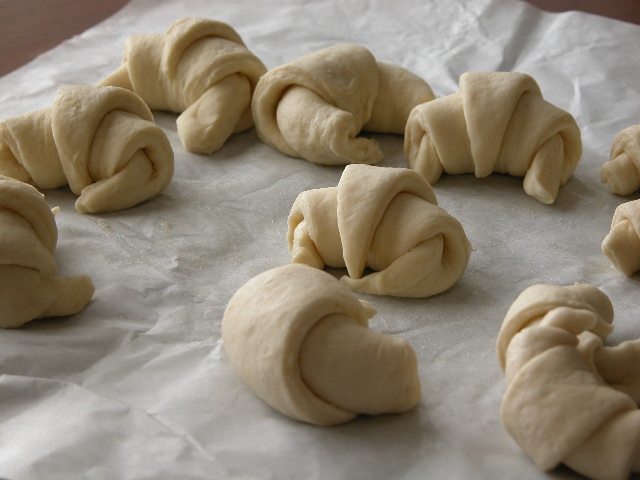
Sourdough croissants rising
Croissants sur levain liquide - (Daniel Leader's recipe)
|
^
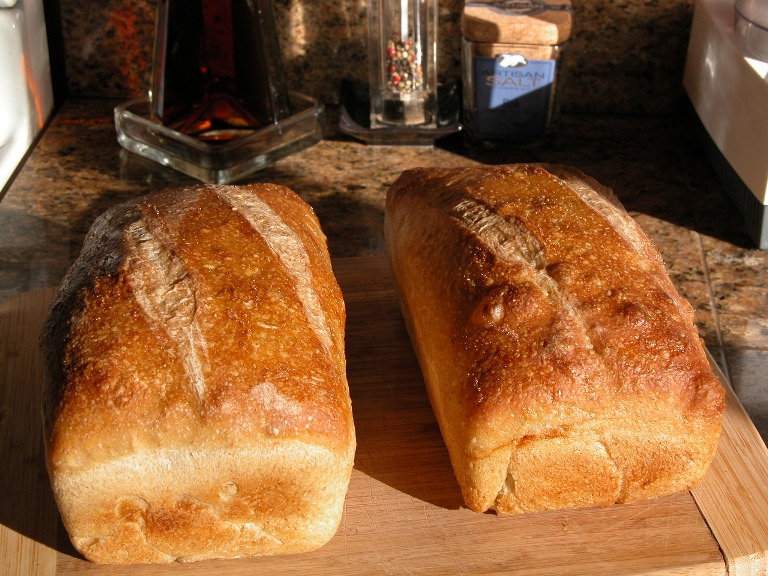
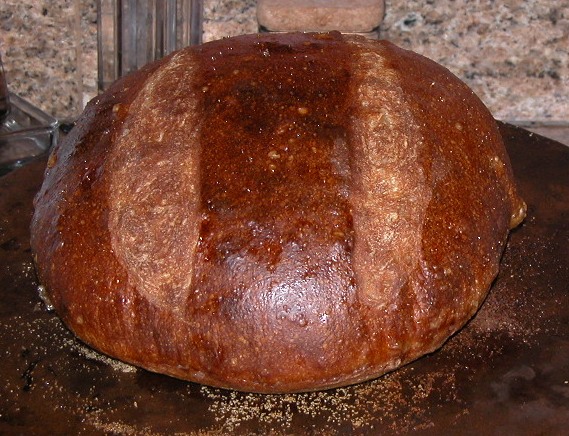
Egyptian Sourdough This recipe is an adaptation of a classic Sourdough recipe, Norwich More-Sourdough, posted by Susan on her site: Wild Yeast. She adapted the recipe from Vermont Sourdough in Bread: A Baker’s Book of Techniques and Recipes by Jeffrey Hamelman. In the loaf pictured above I’ve incorporated 20 grams of Teff flour and reduced the rye flour by the same amount to 160 grams, for an extra sour loaf. Quelle horreur, I used to mix it in a Oster bread machine (until I outgrew it and manifested a professional grade stand mixer.) You'll need a good kitchen scale. A tempafork or thermometer is handy as well. Great bread incorporates careful science and microbiology as well as art. |
|
|
|
Method: If the phrase "elaborate your starter" is new to you, learn how to make great sourdough starter here
In a stand
mixer, mix the flours, water, and starter on low speed until just combined,
about one minute. In an Oster bread machine this will be about 4-6 minutes,
depending on how much you help it with your spatula. You don’t want to see
any dry flour, and are looking for texture consistency throughout. Nor do
you want to over mix. Just combine, but thoroughly. Try to help the machine
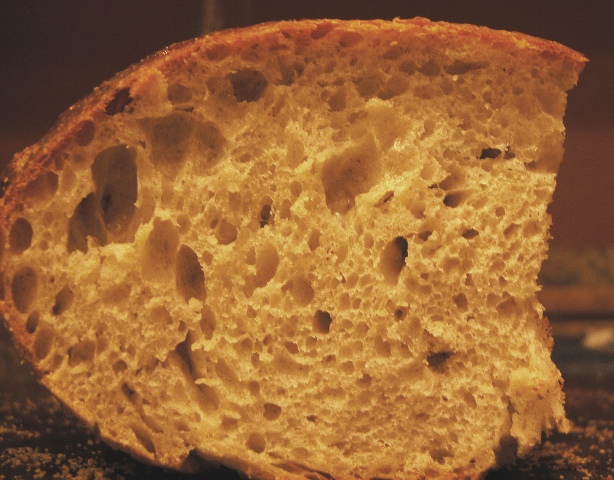
incorporate the flour:
you will get a tighter crumb instead like the background of this web-page
instead of lovely nooks and crannies if you over mix it.
Let the dough
rest (autolyse) for 35 minutes. I’ve left the flour and water to “relax and
loaf” for at least 2.5 hours in my bread machine with no ill results.
This is an important step, where gravity helps moisturize the flour.
Add the salt and
continue mixing on low or medium speed until the dough reaches a medium
level of
gluten development. You won't ruin the bread if you keep mixing
past that point, but your crumb will be smaller and tighter. This should
only take about 3 or 4 minutes in a stand mixer. It is about 6 minutes in
the Oster.
Transfer the
dough to an oiled container (preferably a low, wide one so the dough can be
folded without removing it from the container). Ferment at room temperature
(72F – 76F) for 2.5 hours, with a
fold at an hour and 15 minutes. Optional 2nd fold at 2. 5
hours. I cover it with a couple of damp paper towels over plastic wrap. I
make my bread on Saturday and leave it covered in the cold garage overnight
which retards it enough so that I can bake it Sunday morning. Don't bake it
before it "domes!"
Use the 2nd
fold to separate the dough into two metal loaf pans. Otherwise, turn the
dough out onto a lightly floured counter. Divide it how you’d like and
either preshape them into light balls or pop them into loaf pans. Shape into
boules or batards or spray some olive oil or butter in a couple
of 1K loaf pans, OR place seam-side-up in a floured couche or proofing
baskets OR A buttered ceramic 1kg soufflé dish will work just fine too.
Proof, covered,
at room temperature for 2.5 hours. Alternatively, (this is what I do) the loaves can be proofed
for about an hour and 45 minutes at room temperature, then retarded for
2 – 16 hours in the fridge or garage and (when ripe) baked. This longer
fermentation will yield an even tangier bread. Usually I need to let them
expand outside of the fridge (35F) for several hours, which is why I prefer
the slightly warmer garage (45F). You'll know they're ready when they start
to form a domed top and are slightly pillowly. Don't let the top dry out,
you may have to dampen your paper towels a couple of times to keep
them damp.
1-1.5 hours before you're ready to bake, heat the oven with baking stone to 475F. You will also need steam during the initial phase of baking, so prepare for this now. I fill a shallow pan with boiling water, and remove it after 8 minutes. Heating a cast iron skillet along with your baking stone works too. Throw 1 cup of ice cubes in, or 1/2 of boiling water. No need to remove the skillet, it will help hold the heat in the oven like the stone. If you use the skillet method, about 1/2 cup ice is the amount you'll add for the 8 minute steam.
Baste the crust
with egg white. Do not make puddles, or let pools form around the sides.
Before baking,
slash the loaves as you like. 2 diagonal slashes almost parallel to the pan
is traditional for sourdough. \\ or //.
Once the loaves
are in the oven, turn the heat down to 450F. For 900g loaves, bake for 8
minutes with steam, and another 22 minutes without steam. You'll
probably want to rotate them after the 8 minute steam, to let the remaining
steam escape and for a more even bake. After 1/2 hour The crust should be a deep walnut brown. Then turn off the oven and
leave the loaves in for 10 minutes longer, with the door ajar, to help them
dry. A wooden spoon can hold the door open. Larger loaves will need to be baked longer.
Cool on a wire rack or stand them on one end on a stone counter.
For Oster Bread machine owners:
Leave your machine unplugged as you begin. Remove the container and place it on a kitchen scale. Tare the container and then add the starter. Tare the container again and add the room-temperature water. Then add both pre-measured flours. Do not add the salt yet. Return container to bread machine, plug it in/turn it on and set it to a “dough” setting. Mix approximately 8-10 minutes, helping your machine our by occasionally scraping the sides down and incorporating the flour on top with the liquid below.
Once all of the ingredients are incorporated, turn off/unplug the bread machine. Let your dough rest (autolyse) in the protected environment of your bread machine with the cover down.
After the 35 minute autolyse, plug in/turn on your bread machine again and re-adjust setting to dough if necessary. Add the salt, and continue mixing for 8 minutes. Turn off your bread machine. Allow 75 minutes before transferring dough to an oiled container (Step 4 above.)
Don't tear or break the gluten: Gently S-t-r-e-t-c-h the dough into its new location using a spatula to gently encourage it to move, scraping the slide to allow it to release from the container. Be patient as your dough moves. I wrap a towel around the sharp edges of the bread machine container bottom. Use gravity to stretch and fold the dough into the new location without touching the dough with your hands. You can, of course - but remember this is the "look mom no hands" adaptation, you don't have to. I call this gravity-stretching of the dough "bread yoga."
Continue with step 5
after giving the dough its 2nd stretch 75 minutes later. This is when I do the
traditional letter fold in both directions with the dough. Try not to over
handle it. What I like about this adaptation is that you won’t have to get your
hands very messy– only this 2nd and last fold needs (no pun intended!) to
involve your hands with the sticky glutinous mass. Hence the "look mom, no
hands!" name.
Continue with step 6, above.
Friends Personal Co-workers Family Travelpics Halloween